| Series |
|---|
Day 24: 25 Insights in 25 Days 2019 New Year Marathon!
Learn how I approached a recent Black & White film, with a hold-back color.
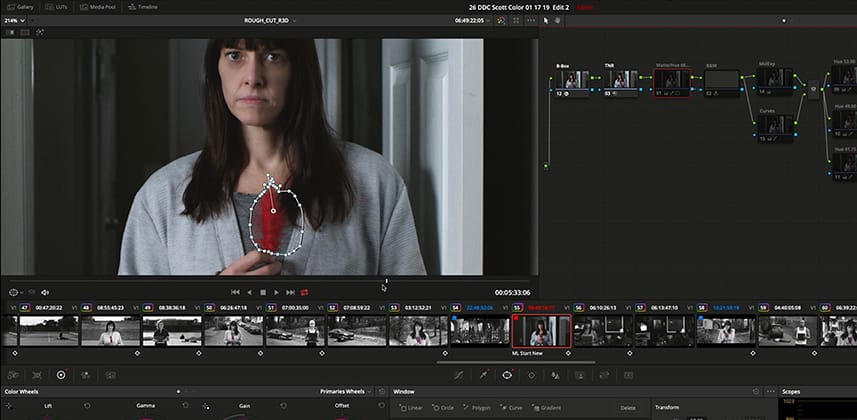
In this Insight, we will explore how to create a soft and dreamy black & white look. We’ll also isolate a colorful object within this black & white film (a feather) and use multiple keys to shift hue, saturation, and gain to push dimension and some life into the object.
The Handoff
Before I begin, I’d like to give a shout out to my friend and colleague, Taylre Jones, for developing the very early stages of the look of this film.
The Black & White Grading Process
In Resolve, there are a number of ways to grade a black & white film. I typically use the RGB Mixer set to monochrome rather than zeroing out saturation or using a LUT. Being able to individually adjust the RGB sliders can produce some great effects. For example, toying with the red channel can produce some creamy skin tone and also dramatic skylines. For other cool black & white tricks, check out Dan’s use of the RGB mixer. Dan has another Insight that covers black & white exposure and tonality that you might find interesting, as well.
The Look
Ida is the inspiration for this film. Ida is a gorgeous, dreamy movie and has a stunning 1940s monochrome look. Although the director loved this look, I purposefully did not use stills from Ida for matching. Rather, I just watched the movie and then went for it.
What Did I Get Myself Into?
The central symbolic theme in this film is a violet feather. Violet feathers, however, are not readily available. The director needed me to isolate the red feather and change its color to violet. This created a bit of a challenge, as the actress’s black & white skin tone needed to be maintained when keying the red feather and shifting its hue.
This might seem like a pretty easy thing to do, but in this film, the feather is being held or carried by the actress and it’s moving throughout the film. In two instances, it is transferred from one person to another.
Color matching the feather, isolating it from skin tone, and dealing with wind and movements generates a number if challenges. In the end, it turned out great, was a labor of love, the result was rewarding, and the director was very pleased.
Due to the time-consuming tracking and hue tweaking process involved on this film, I won’t be doing this grade completely by scratch. Instead, I’ll walk you through the details of my process node-by-node. If you have any questions or comments, please leave them below.
If you have any questions or comments, be sure to leave them below!
-Scott
Member Content
Sorry... the rest of this content is for members only. You'll need to login or Join Now to continue (we hope you do!).
Need more information about our memberships? Click to learn more.
Membership optionsMember Login
-
Beyond Crypto-Kitties – Blockchain technology in post production
-
Breaking Down A Black and White Film with a Violet Twist
-
Behind The Curtain – 16mm Style Grade Part Four
-
What Is A CDL And When Do You Use It?
-
Revisiting Using A Single Large Format Monitor
-
Rotoscoping to Replace a Foreground Element in Resolve Fusion
-
From Commercial Colorist to Dailies – How Does the Job Change?
-
Get Out There! – Updating Your 2019 Showreel
View All