
A Long Awaited Update To A Workhorse Mac
2014 doesn’t seem like that long ago, right?
Maybe not in life, but in computing terms it’s a lifetime. Until October 30th, 2018, the popular Mac Mini had gone over 4 years without an update!
I’ve owned every Mac Mini going all the way back to the G4 version (remember those?!) in 2005, and I’ve come to love the Mac Mini not only because of its form factor, but because of its usefulness in so many things I do including helping me in the color suite. I bought the last released version at the end of 2014 and to say by 2018 it was getting a little long in the tooth is a huge understatement.
In this Insight, I’d like to share with you why I think the recently announced 2018 Mac Mini is the perfect companion to a full-featured workstation including the configuration I ordered, and how I’m using the machine.
The Hardware
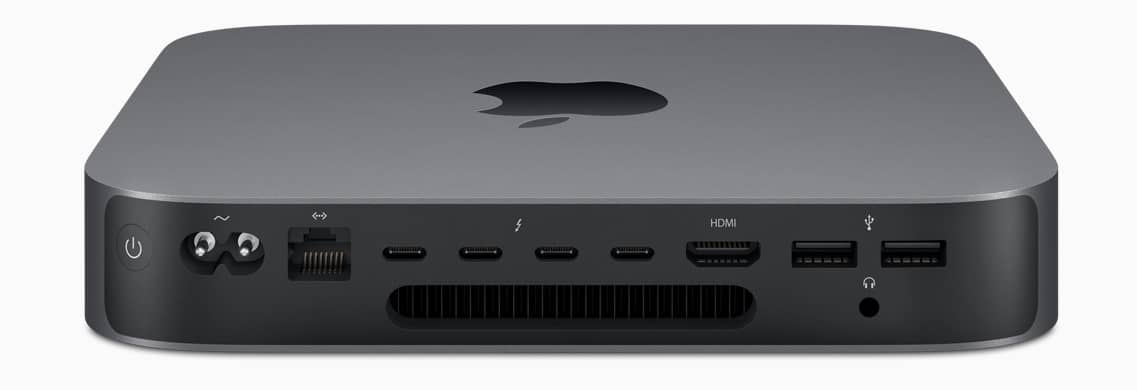
The 2018 Mac Mini is a significant hardware update to the 2014 Mac Mini. Although the outside form factor is nearly identical, the 2018 Mac Mini features a new Space Gray finish, revised I/O including 4 Thunderbolt 3 ports, 2 USB 3 ports, an HDMI 2 port, significantly improved processor choices, up to 2TB of PCIe storage, and up to 64 GB of Ram.
Here are you’re customization options:
- Processor – choose between i3 3.6GHz 4Core, i5 3GHz 6 Core, i7 3.2GHz 6Core
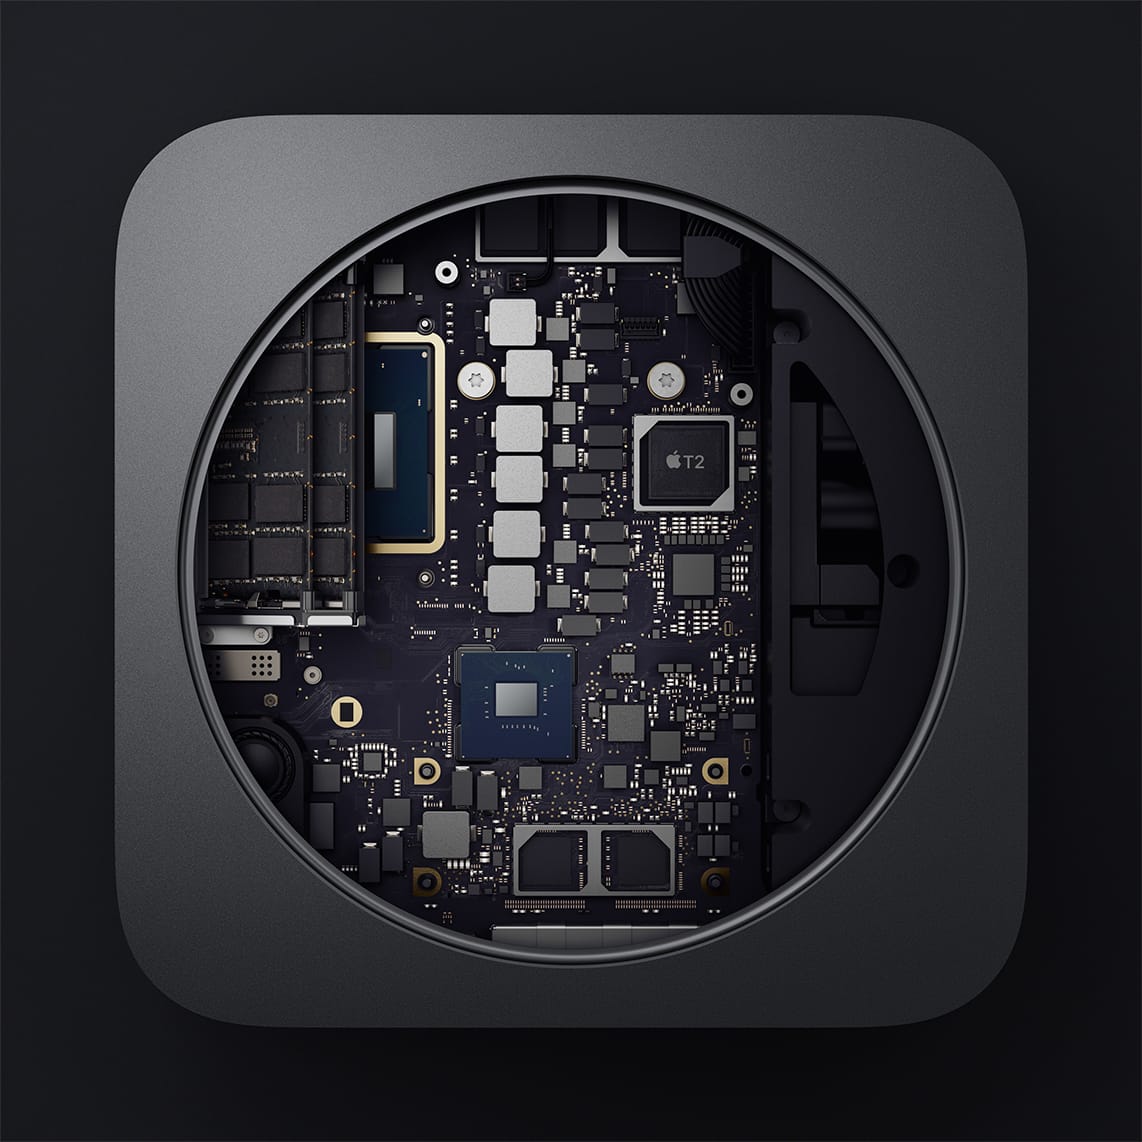
- 2666MHz DDR4 Ram – 8GB, 16GB, 32GB, 64GB. Ram can technically be user upgradable, but check out the video below – it’s a little scary.
- Storage – 128GB, 256GB, 512GB, 1TB, 2TB PCIe SSD (flash)
- Network Adapter – 1GBe, NBase-T Adapter with support for 1GBe, 2.5GBe, 5GBe, 10GBe. Both adapters use a standard RJ-45 connector.
My Configuration
Let me be blunt, I think if you’re looking to the Mac Mini to be a full-featured workstation, you’re barking up the wrong tree.
While the 6-Core processor isn’t bad, it doesn’t have the umph that a higher core count i7, i9 or Xeon might have. Additionally, the GPU in the 2018 Mac Mini is integrated with the CPU – so you’ll likely want to use an eGPU with it if you require heavy lifting in apps like Resolve (more on that later). Also, if you fully trick out the Mac Mini + add an eGPU setup like one of the options available from Blackmagic, then you’re total cost could soar well north of $5,000.00!
In my opinion, at that price, you’re better off with an iMac or lower end iMac Pro.
When I went to go build the 2018 Mac Mini (I got two identical units – one for home and one for office) I had a few goals:
- Support 4k Resolution for Divergent Media’s Scopebox.
- Act as ‘ProRes Dongle’ in my home setup.
- Act as FTP server and handle transcodes and compression tasks as necessary.
- Run Mac-specific apps like Lattice.
- Support my office & home NAS setups (Lumaforge Jellyfish) with 10GBe support and no external 10GBe adapters.
I knew I could accomplish all these goals without breaking the bank on a Mac Mini and paying the high prices that Apple charges for Ram & Storage.
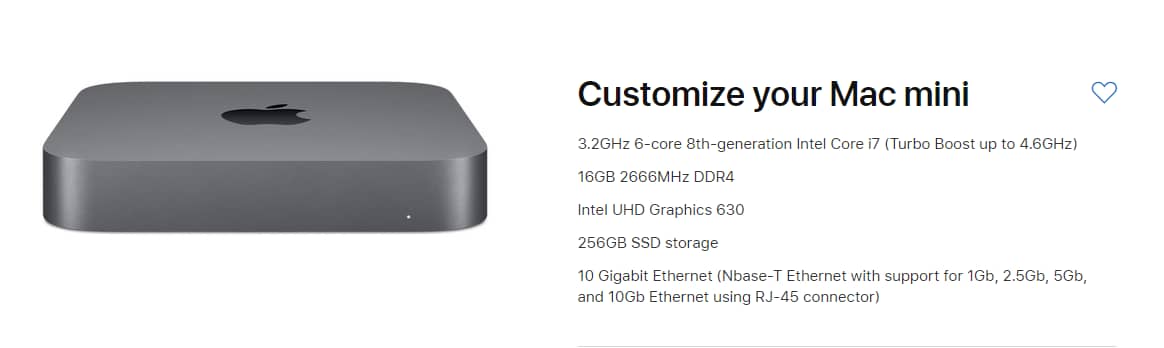
Here’s my configuration:
- Upgraded 3.2GHz 6-core i7
- 16GB Of Ram
- Baseline storage (256GB) for this config
- 10GBe built-in network adapter
Hold on! Didn’t I just say I didn’t want to pay Apple’s high prices on Ram? So why did I upgrade the Ram from the stock 8GB to 16GB from Apple?
Originally, I was planning on buying a 32GB kit from Amazon for less than $275. But after I watched the video below, I got… well….discouraged about upgrading the Ram myself! Note: RAM is the only upgradable part of the Mac Mini all other parts are soldered to the motherboard.
So, I did end up upgrading the RAM to 16GB and so far, I feel like that has been suitable. I don’t plan on caching massive comps in After Effects on this thing, but your mileage may vary and you might have more stomach for completely taking the machine apart to upgrade its memory.
Hello, Adapter(s)
The reality for every Mac sold these days is that adapters of all sorts are needed for connectivity. This is true of the Mac Mini, but unlike Apple’s laptop offering there are standard ports like 2xUSB 3 ports, a full-sized HDMI 2.0 port, and an RJ45 ethernet jack that can be ordered as gigabit or 10GBe capable.
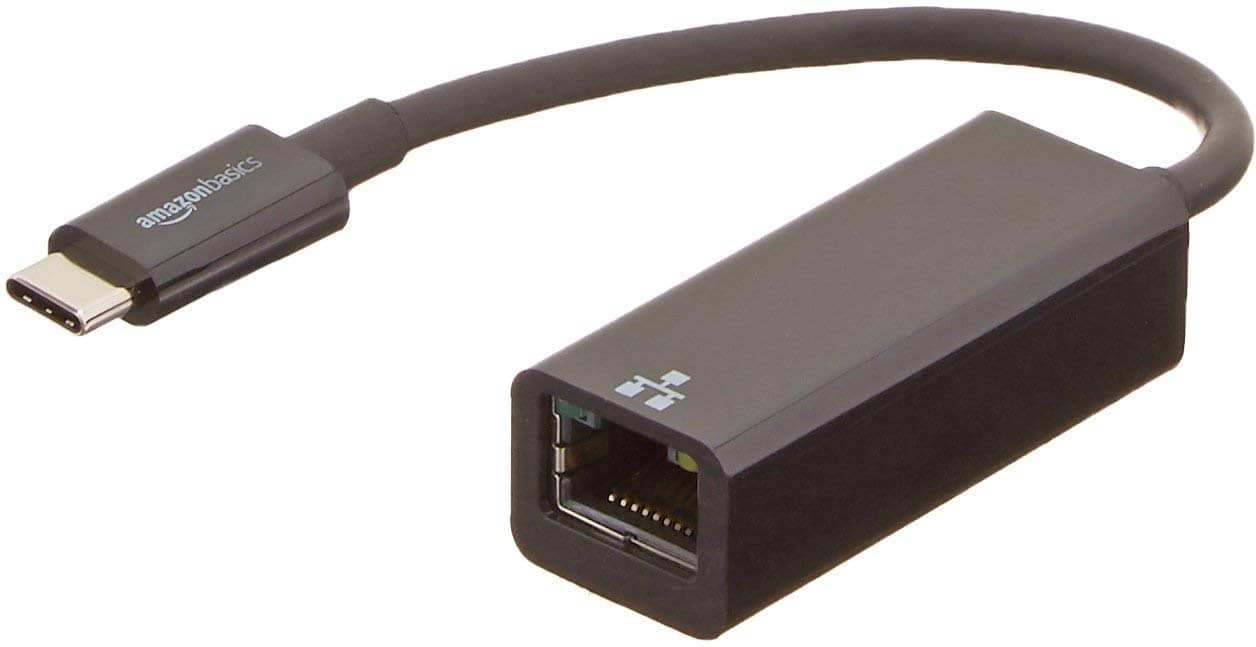
If your plan is to use the 10GBe connection to a NAS/SAN, then the first adapter you’ll likely need is a USB-C or USB 3 to Gigabit Ethernet adapter for your regular network (note: Wifi is an option for this too, but I prefer wired connections if I can make them work).
Another adapter you may want to have ready with the Mac Mini is a Thunderbolt 3 to Thunderbolt 2 adapter. In my setup, this was necessary to connect an LTO-7 Thunderbolt 2 tape drive to the system.
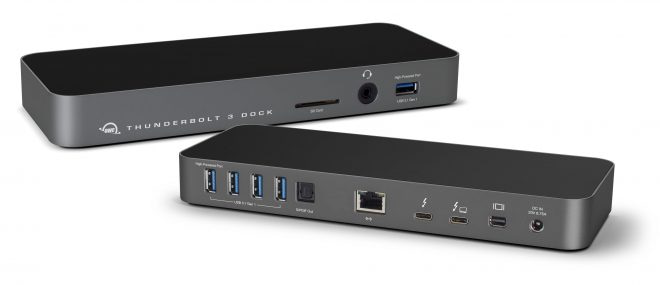
If two USB 3 ports is limiting for you, investing in an affordable USB 3 hub is probably a smart move, or if you want even more versatility a Thunderbolt 3 dock might not be a bad idea.
Some Initial Setup Problems
With the new Mac Mini’s I ordered in hand, I was eager to dive in and set them up. Everything was going according to plan until I tried to connect to my shared storage via SMB. NFS connections were fine, but in my setups, I need to use SMB because of all the PCs I utilize.
The issue was that I was getting horrible, I mean horrible speeds via SMB (10-12MB/s).
After doing a little digging around, it seems this is a pretty common issue with Mac OS 10.13 and now 10.14. The issue stems mainly from SMB signing (security) between the Mac and SMB server (or vice versa).
I found this great article that explores how to ‘tune’ SMB connectivity. Essentially it comes down to one command that you can enter into a terminal window:
printf "[default]\nsigning_required=no\n" | sudo tee /etc/nsmb.conf >/dev/null
This disables signing. Turning this off got my speeds back to where they should be, but I still felt the connection was lagging.
Researching more, I found this support document from Apple describing how to improve SMB volume browsing behavior
Here’s the command that really fine-tuned SMB connectivity for me:
defaults write com.apple.desktopservices DSDontWriteNetworkStores -bool TRUE
I’m not sure if the problem is universal to all Macs running 10.13 or 10.14, or if it’s specific to my shared storage setup, but these small tweaks worked for me and if you run into the same issue, hopefully, they can help you too.
Use Case #1 – (4k) Scopes
Team Mixing Light is a huge fan of Divergent Media’s Scopebox. In fact, it’s one of the biggest reasons I have to own a Mac – I simply can’t function in the color suite without it – Scopebox is Mac only. Its resolution independence is also one of its great features.
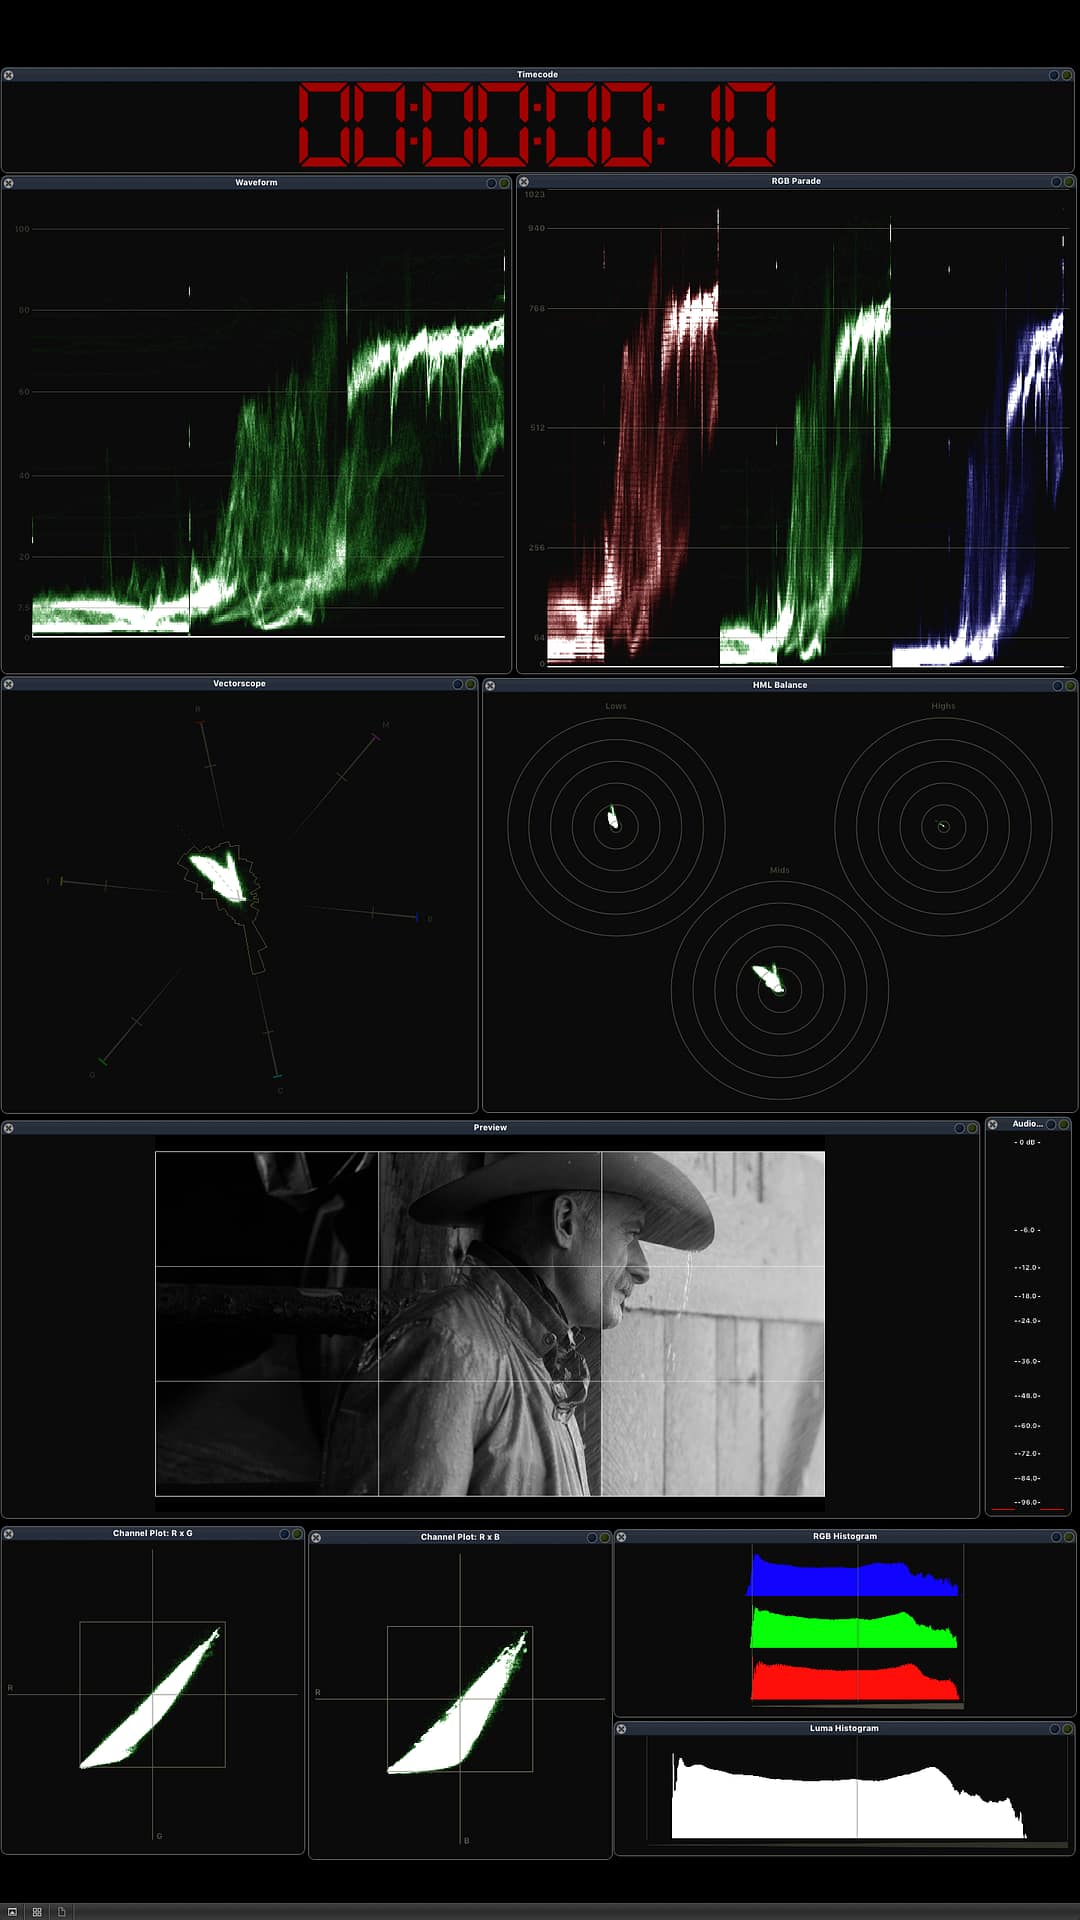
While one could certainly make the case of ‘what’s the point of 4k scopes?’ I’ve never liked when working with 4k/UHD projects (or higher) to have my scopes being fed a downconverted HD signal – which is what I had to with the previous generation (2014) Mac Mini as the integrated GPU simply couldn’t keep up with 4k/UHD.
The 2018 Mac Mini has Intel UHD Graphics 630 GPU, which isn’t going to do a ton of heavy lifting in Resolve but is 100% suitable for running Scopebox in 4k/UHD.
I’ve had zero problems with dropped frames, or other stuttery playbacks in the latest version of Scopebox on the 2018 Mac Mini when feeding UHD/4k signal.
Speaking of the signal, how exactly am I getting 4k/UHD into the Mac Mini?
Thunderbolt 3 Expansion & Decklink Card
If you’re using Scopebox currently, it’s likely that you’re using the Blackmagic Ultrastudio Mini Recorder. This 3G SDI Thunderbolt 2 box is very handy, but is limited to HD resolution and needs to be adapted to work with the 2018 Mac Mini (TB2 > TB3). The Blackmagic UltraStudio HD Mini solves the Thunderbolt problem, but it still only operates at HD resolution and is significantly more expensive.
Thinking about this problem, my first thought was to get an UltraStudio 4k. But at $995 and with a whole bunch of connections I don’t need (not to mention its super noisy fan) it didn’t seem worth it.
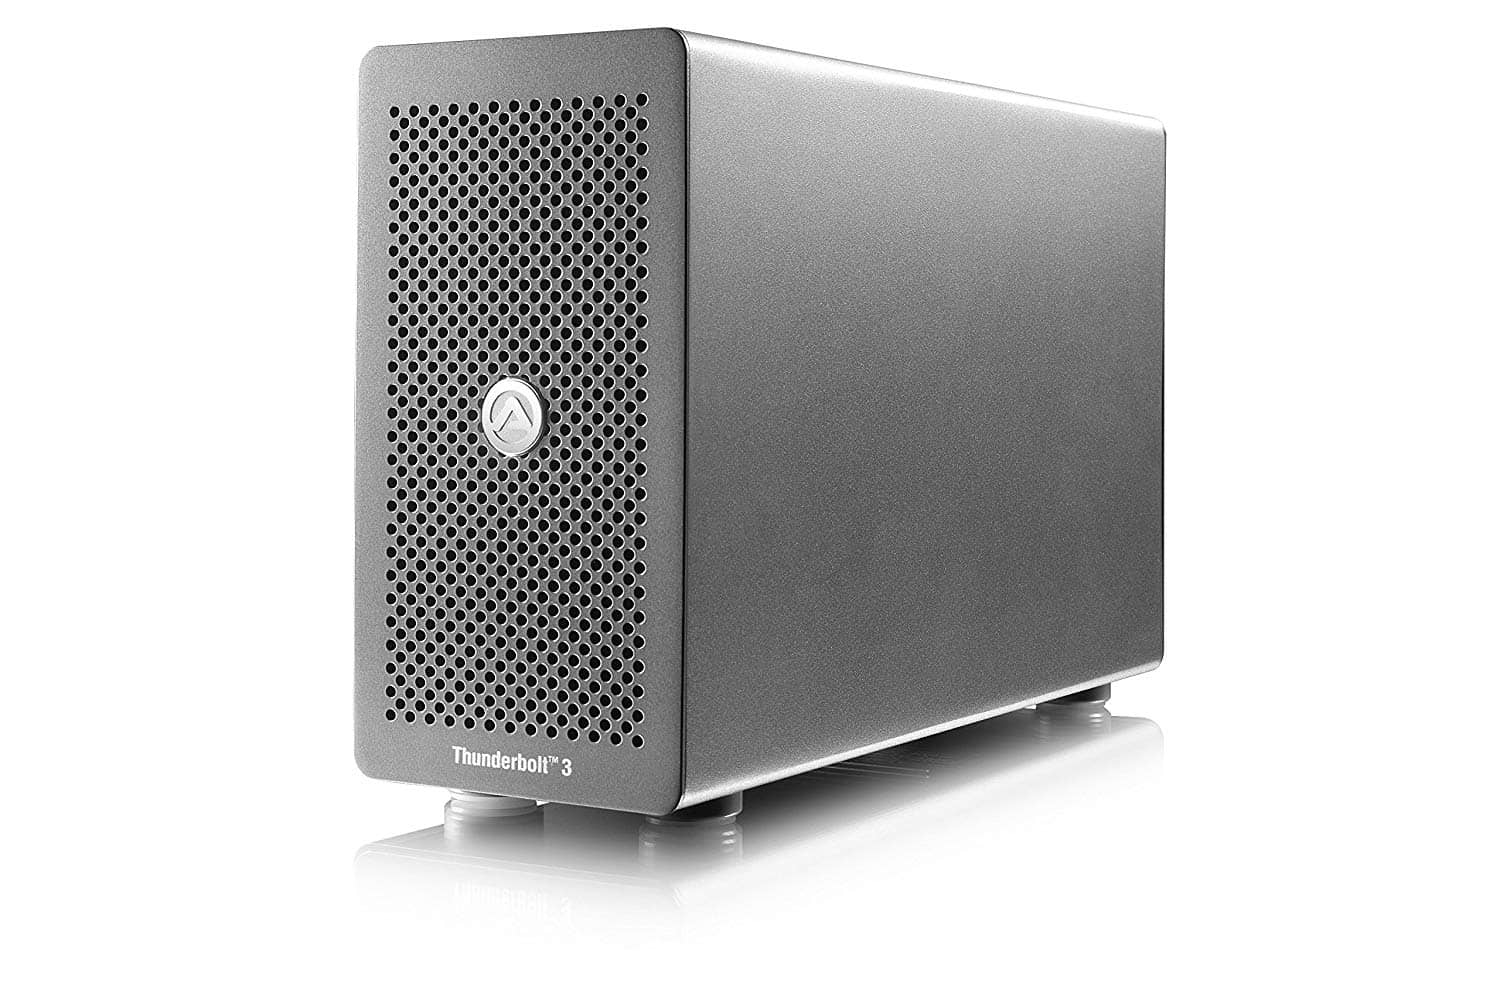
What I ended up doing was getting (used) an Akito Node-Lite (these retail for $200, I snagged one on eBay for $120) and then I re-purposed an older Decklink 4k Pro card I had – although the 4k Mini Recorder card would also work just fine.
This setup allows me to get 6G SDI (2160p30 444) to Scopebox – def. good enough for my needs.
Use Case #2 – Remote Rendering (aka ProRes Dongle)
I made the move to Windows many years ago, but currently, the single most annoying thing on Windows with Resolve is there is no native render of ProRes.
While many people are ok with rendering a DNxHR MXF and then transcoding that on a Mac, I think that’s a waste of time as you’re creating two big files and you’re doubling your render time.
In a previous Insight, I discussed Remote Rendering with a Mac and how great it is, but I was always annoyed that with the previous Mac Mini I had to invest in a somewhat expensive Thunderbolt 10GBe network adapter to gain access to my shared storage. The 2018 Mac Mini features an optional 10GBe adapter built in allowing for easy connection to my shared storage at less cost than using an external adapter.
As detailed in my original Insight on Remote Rendering, render caching files to networked storage can allow a less capable machine like the Mac Mini to fly through renders. And the 2018 Mac Mini doesn’t disappoint in this regard either – I’ve noticed faster renders thanks to the 6-core processor and better-integrated GPU.
But what’s blown me away is with projects that I haven’t render cached performance is up 50-75% on shots with straight-ahead grades (clips with noise reduction or certain OFX can still render very slow, so you may want to cache those items first). Performance is also significantly up on UHD/4k renders that used to give me GPU errors on the older version of the Mac Mini. These performance gains are significant, but probably not unexpected on a machine that is 4 years newer than the previous generation.
Using an eGPU
It may be that the Mac Mini like the one that I’ve built is just fine for your Remote Render needs – especially if you’re using render cached files, but the advent of Thunderbolt 3 and eGPUs has opened the door to even more (and flexible) power on a machine like the Mac Mini.
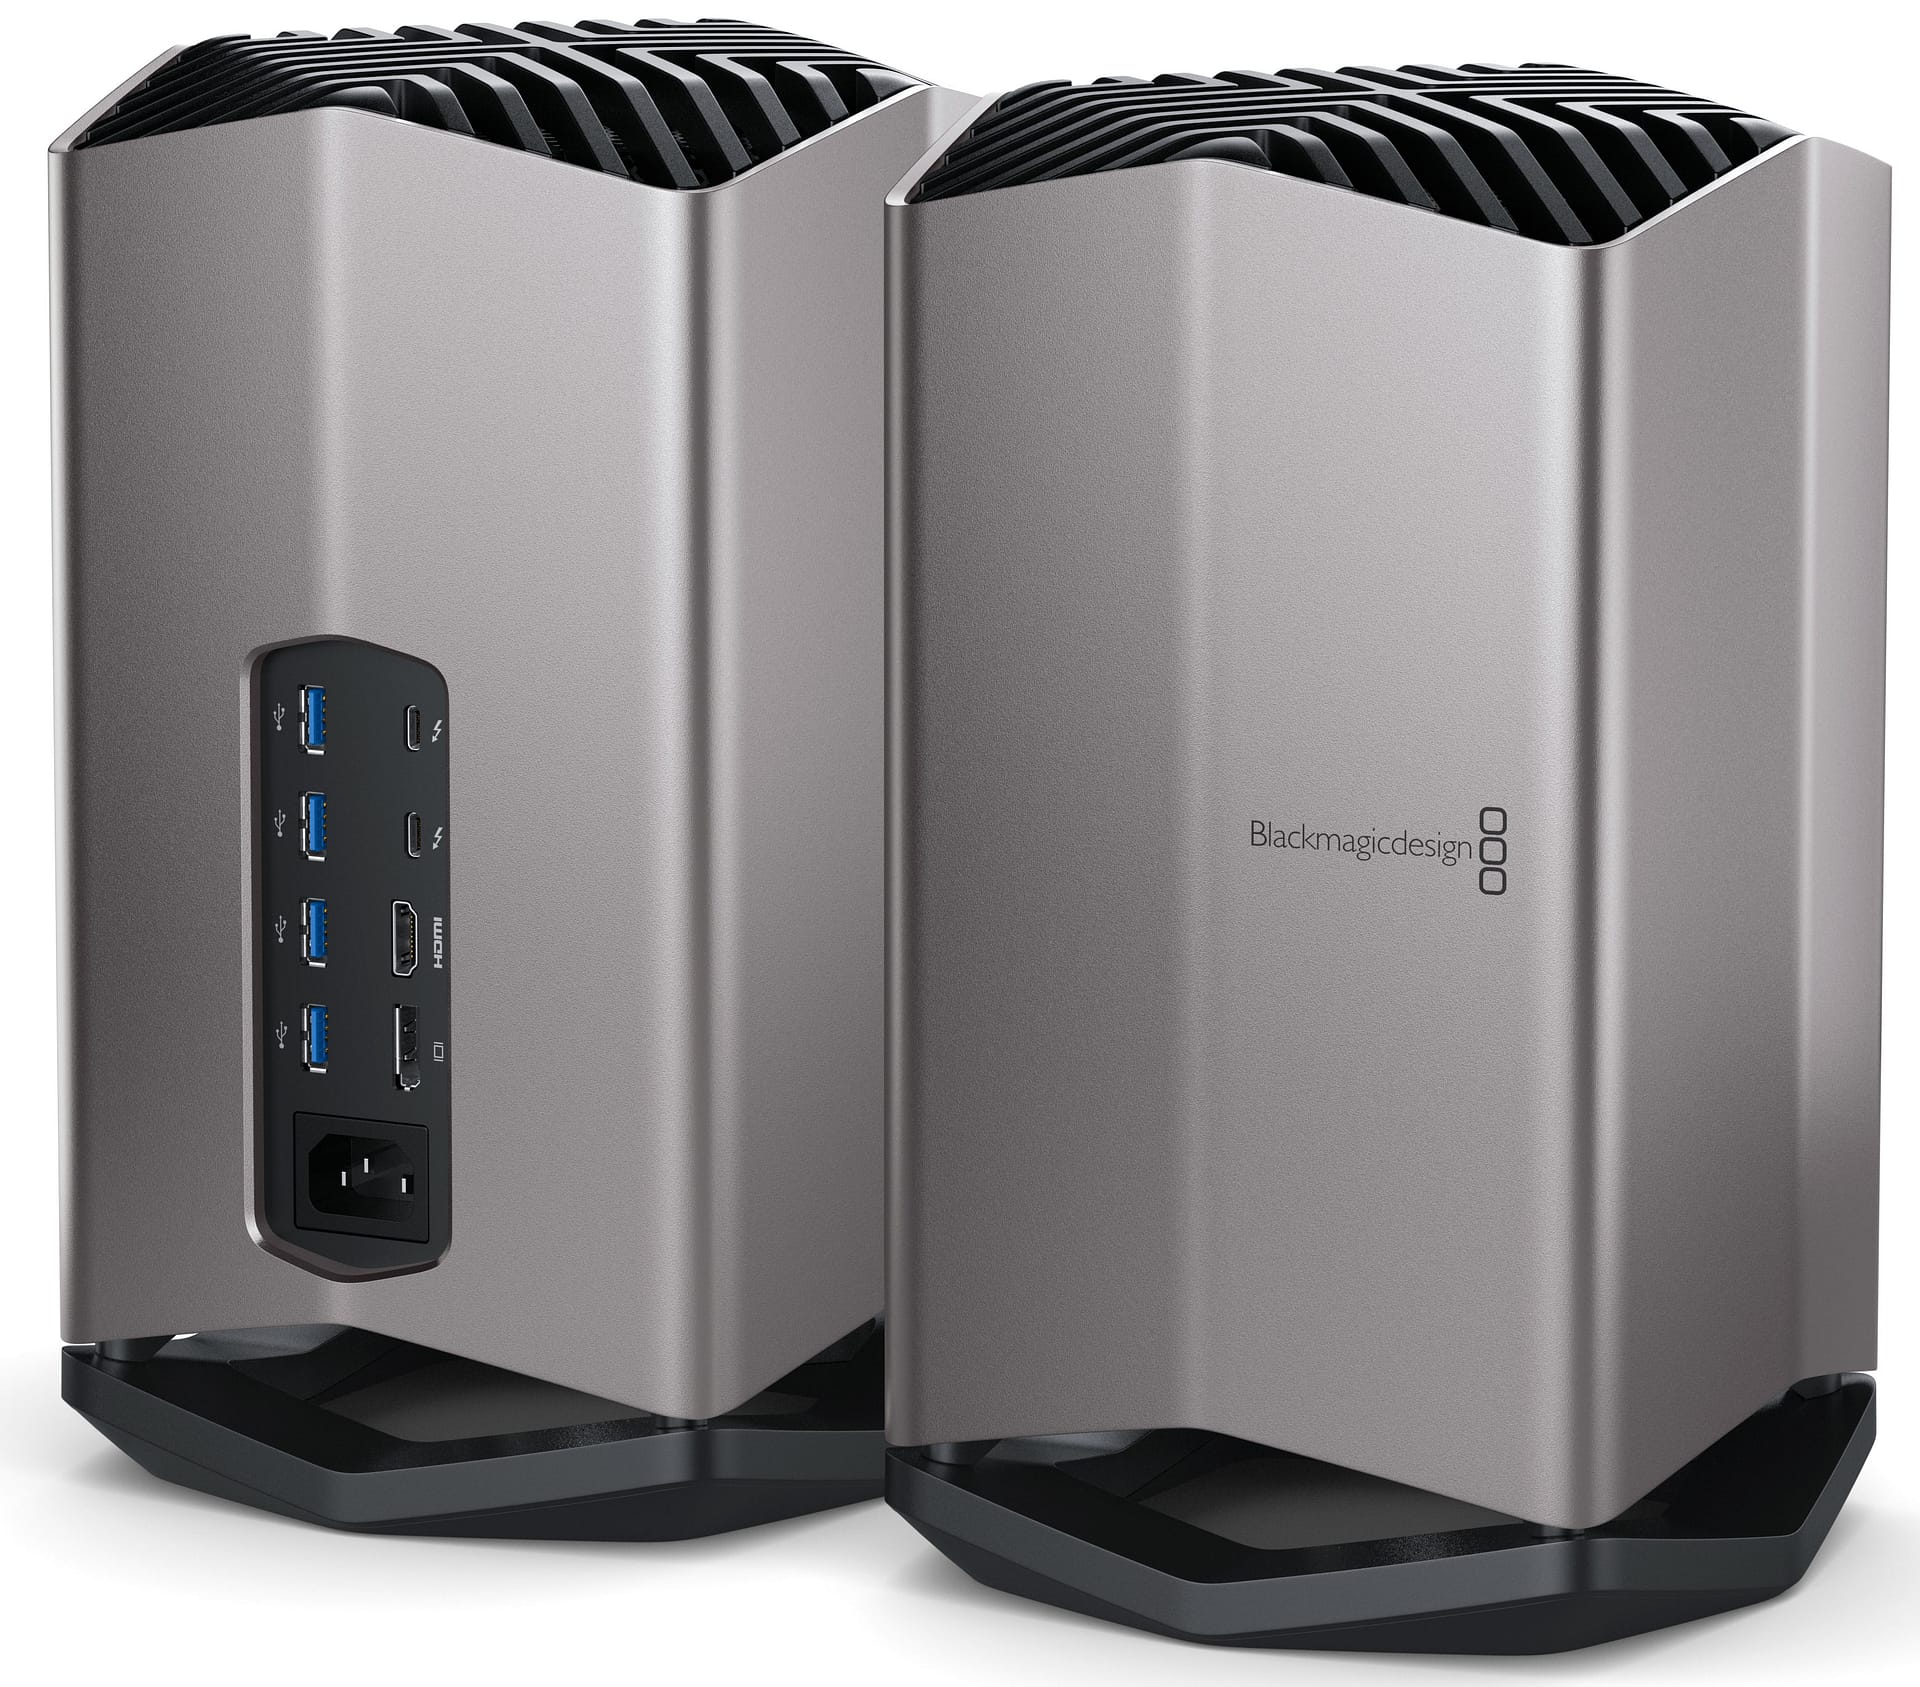
Earlier this year, Blackmagic released their own eGPU built around a AMD Radeon Pro 580, and just recently released the eGPU Pro model around a much more powerful Radeon RX Vega 56. Apple is even promoting these solutions on its own website.
While there is a lot to love about these units – especially the additional USB, HDMI and Thunderbolt 3 ports on the back of each one, the fact that the actual GPU can’t be swapped out at later date is an issue for me. Also, in general, I’ve found AMD cards to not be nearly as powerful.
So why not use an NVIDIA card as a 3rd party GPU enclosure?
That’s exactly what I want to do! I’d like to repurpose the GTX 1080TI in a Razer Core X that I own and use with a Windows laptop, but currently, with Mojave (10.14) there are no NVIDIA web drivers available. I have it on good authority, that it is Apple blocking NVIDIA, but right now, it just doesn’t work. If this goes on with no resolution, I may just end up with an AMD card – that I don’t want to have or buy.
Just keep in mind with any eGPU, performance is never going to be quite up to par with a dedicated GPU running over PCIe inside the computer.
Use Case #3 – FCP X & Transcoding
For me, another reason to have a Mac Mini in my home and office setups is Final Cut Pro X.
Surprisingly, over the past year, FCPX originated projects are on the rise for my facility and I sometimes need to dive into the FCP project and adjust things prior to creating an XML for Resolve. And let’s be honest, FCP X has the best XML integration of any NLE workflow with Resolve.
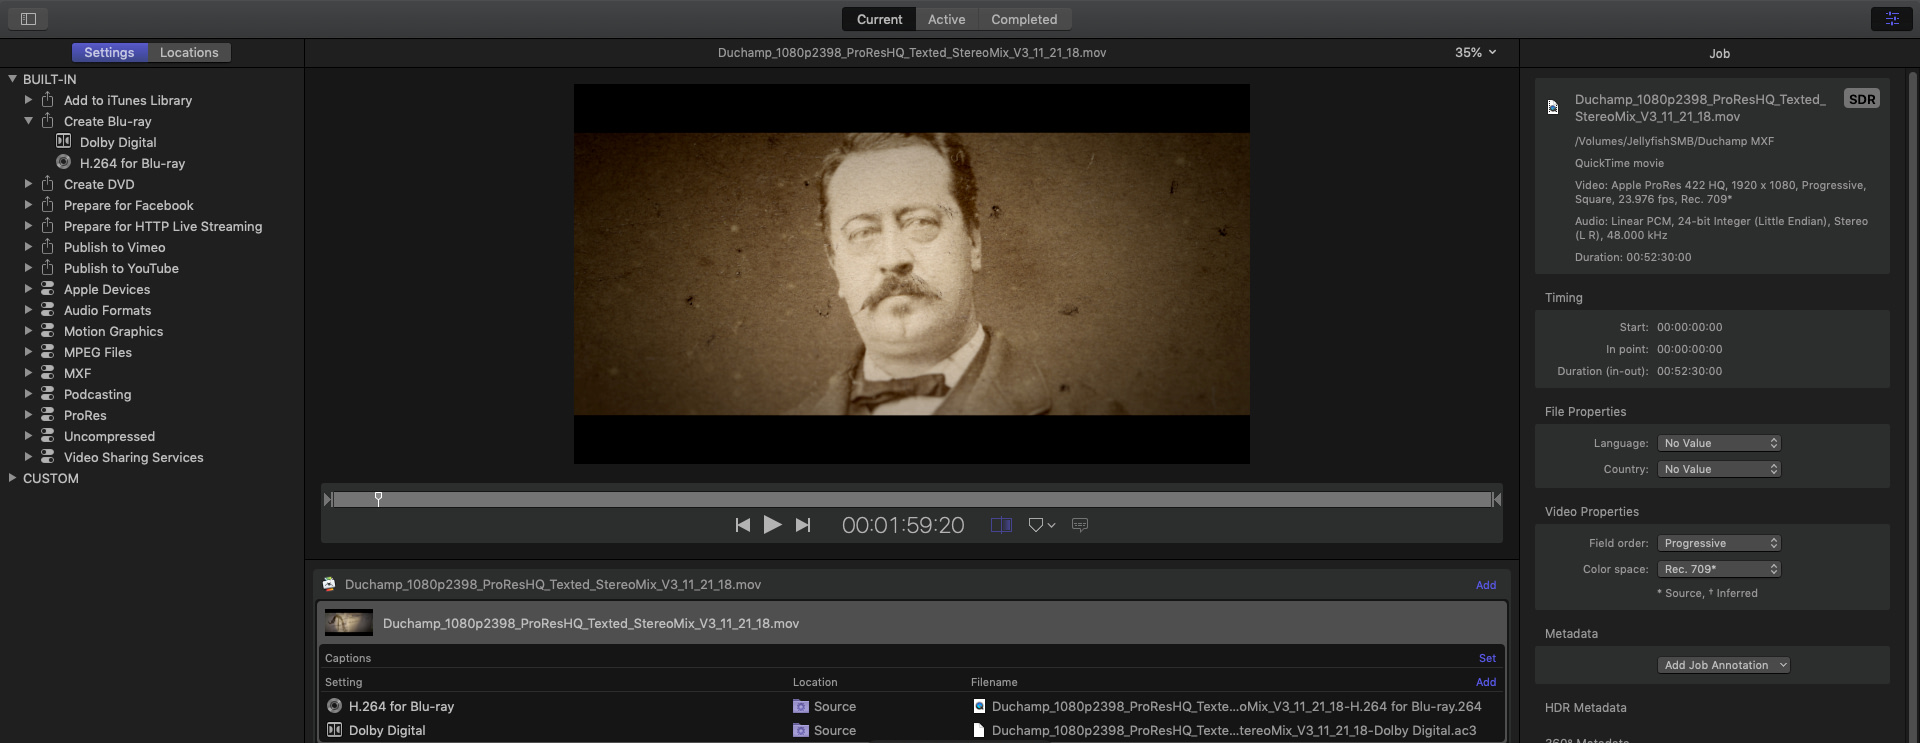
If you’re like me, you’re also often running H264/65 encodes for clients or doing Blu-Ray encodes (Apple Compressor still supports Dolby Digital .ac3 thankfully!) – offloading that work to another machine can be really helpful. The 2018 Mac Mini mainly because of its 6 core processor and Intel QuickSync technology can accelerate H264 and H265 workflows.
I use Adobe Media Encoder and Apple Compressor (the later mainly for ac3) a lot, I’m very happy with the overall performance of the 2018 Mac Mini for essential transcodes and encoding.
Use Case #4 – As A Server
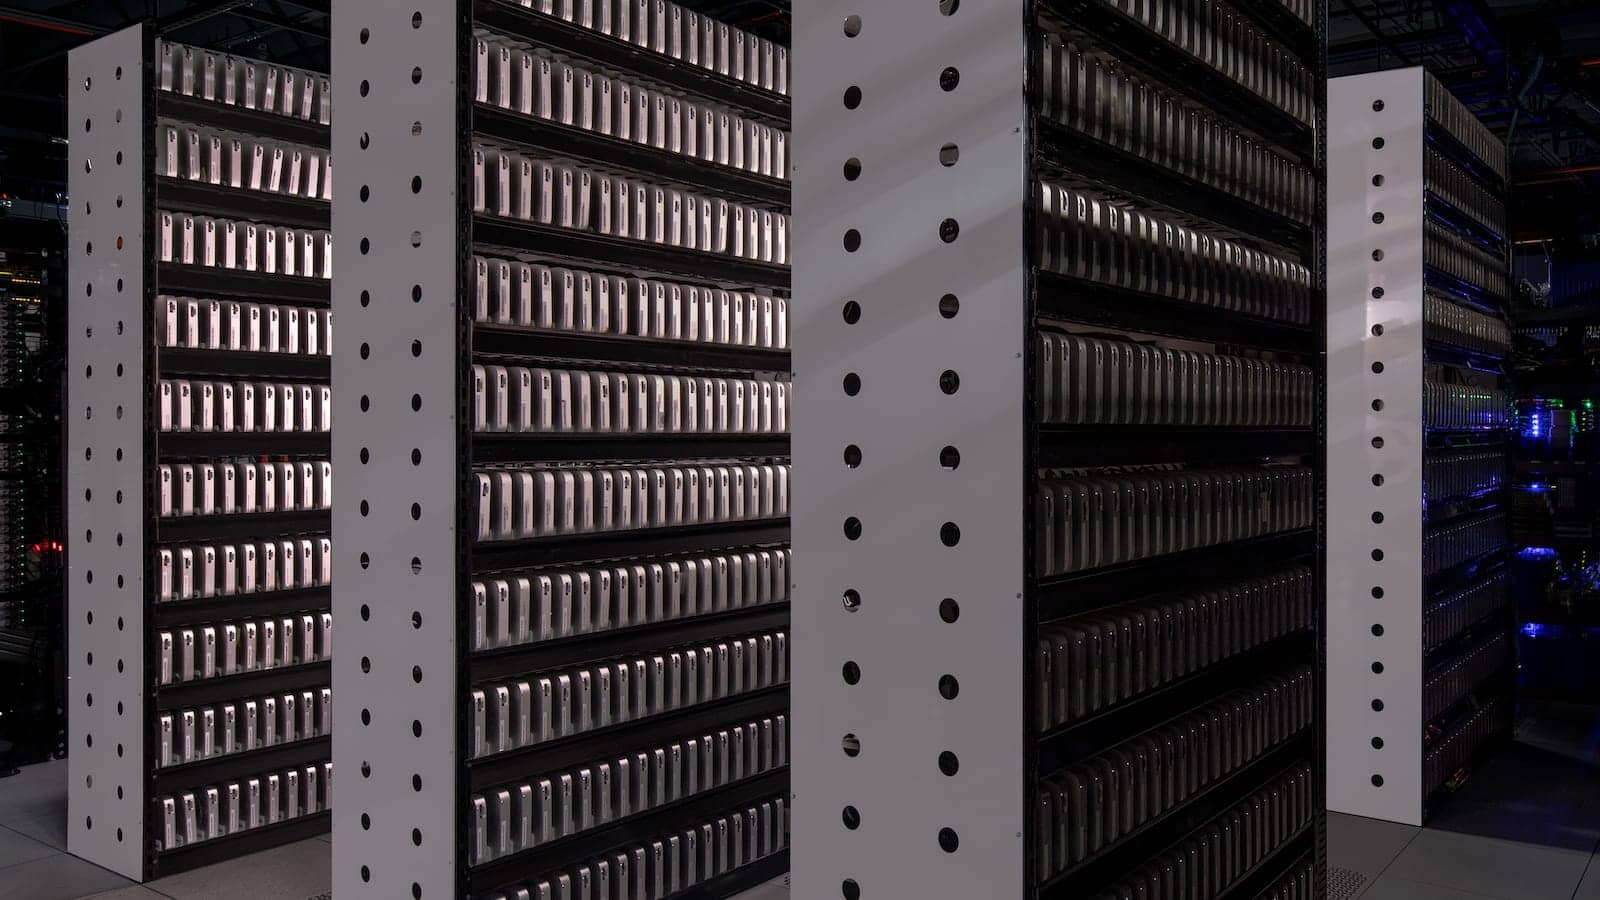
All over the world people have been using the Mac Mini as a cheap server for years. Now the addition of a 10GBe built-in adapter and 6 core processors will make it even more viable for this purpose. Indeed, Apple featured the Mac Mini at the announcement of the machine as a capable server that has high density in equipment racks – and certainly, the addition of 10GBe will make many data center managers happy.
I have no need to serve websites, or host email, but I have and will continue to use a Mac Mini to handle a number of server like tasks:
- Resolve Database Server – a fantastic use of the Mac Mini is to set it up to host shared Postgres SQL databases.
- FTP – I’m a big fan of Rumpus & more recently Own Cloud. The Mac Mini can easily host these services.
- VPN – Using OS X server (which is just an app now) You can host a VPN setup on the Mac Mini. I use VPN all the time to access my office network (databases etc) from a remote location.
Final Thoughts
The obvious question – is the new 2018 Mac Mini worth it?
Yes, very much so if you’re using it as a supplemental machine to a full-fledged workstation.
If your goal is to use the Mac Mini as your main computer then you’ll have to trick it out; the fully loaded the Mac Mini is $4,199! You’ll likely want to add an eGPU to that config taking the price up another $800-$1200. At over $5000, in my opinion, there are much better options – like an iMac or a lower level iMac Pro – you even get an amazing 5k screen!
However, for my needs, as I’ve outlined in this article, the 2018 Mac Mini has been a great upgrade and I suspect once Apple/Nvidia can figure out NVIDA drivers with Mojave I’ll like it even more with an eGPU setup.
Have questions or something to add to the discussion? Please use the comments below
-Robbie