| Series |
|---|
Day 20: 25 Insights in 25 Days 2019 New Year Marathon!
Part 2: Adding a foreground back using Masks and keys
In Part 1 of this topic we looked at how to remove an object from a scene using the Paint tool and the Clone brush. Now we need to add back any foreground elements which had been removed by the Paint tool – in this case its the girl’s hand as it goes over the area where the glass was.
It’s often a good idea to use several different Masks if you have a complex shape, like a body with limbs and a head. It’s much easier to treat these separately than trying to animate a single mask with a complicated outline of the person.
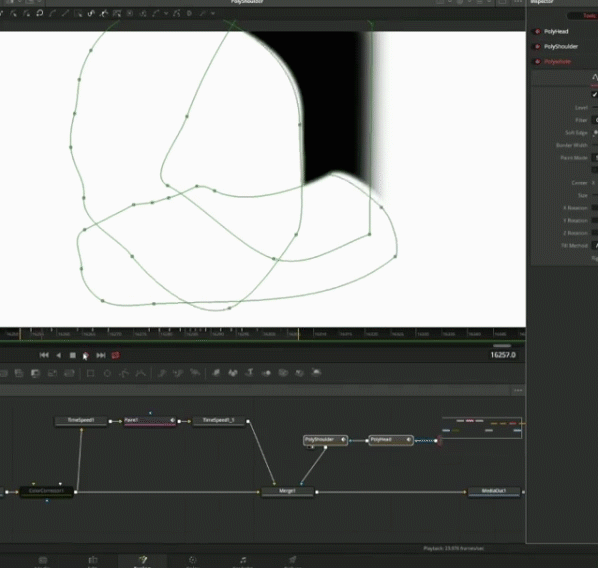
Instagram: Using multiple shapes
You’ll notice that I try to use as few keyframes as I can, only key-framing at a point when the natural motion changes but I then go back and see if I need to add extra keyframes in between.
Bezier vs. B-Spline
I usually opt for Bezier curves for everything but I’ve recently been trying to use B-Splines as an alternative because the handles on Bezier curves can need lots of tweaking when doing roto like this. The good news is that Fusion lets you convert your shape after you’ve made it if you change your mind. Right click in the viewer with the BSpline selected and there are a ton of options under the BSpline:Polyline> menu including ‘B-Spline to Bezier’ (or the other way).
You can manipulate the control points on your polyline by dragging a lasso over the desired points and then;
- Hold T while dragging to rotate the points about the point where your mouse is dragging.
- Hold S while dragging to scale the points, centred on the point where your mouse is dragging.
- Shift + B will turn on a bounding box around the selected points. You can then drag the edges of the box to scale it, hold shift to move the individual corners of the box and hold cmd (or ctrl) to size it, scaling from the centre of the box.
- Update: Hold W while dragging to control the ‘weight’ of selected control points in a B-spline
Temporary CC tool
I’ve found that having a Colour Corrector tool in the flow which I can turn on and off really helps me to know exactly where my shape is that I’m replacing (be sure to turn it off before you render!). I use a dummy colour corrector in all sorts of situations when doing invisible fixes, just to make my fix visible for a moment to see what’s going on.
Member Content
Sorry... the rest of this content is for members only. You'll need to login or Join Now to continue (we hope you do!).
Need more information about our memberships? Click to learn more.
Membership optionsMember Login
-
Beyond Crypto-Kitties – Blockchain technology in post production
-
Breaking Down A Black and White Film with a Violet Twist
-
Behind The Curtain – 16mm Style Grade Part Four
-
What Is A CDL And When Do You Use It?
-
Revisiting Using A Single Large Format Monitor
-
Rotoscoping to Replace a Foreground Element in Resolve Fusion
-
From Commercial Colorist to Dailies – How Does the Job Change?
-
Get Out There! – Updating Your 2019 Showreel
View All